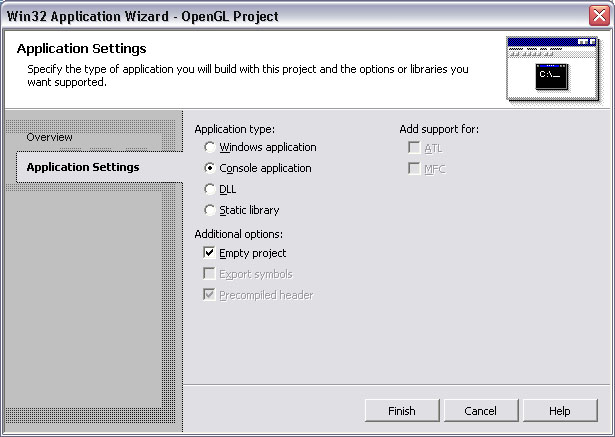
Your empty console project will be created.
Visual Studio .NET is a fantastic IDE, and with it you can write programs that will run in both Windows and Linux with no fuss. This guide will show you how to set up a Visual Studio project that will do just that, provided it is a pure OpenGL application using GLUT. This guide also assumes Visual Studio .NET 2003 (and/or 2002) is already installed and you are familiar with its use.
Click here for the Quick Version of this guide (if you simply need to refresh your memory).
Windows comes with OpenGL, and Visual Studio comes with the OpenGL libraries, but neither of them comes with GLUT. Get the newest version of GLUT here: GLUT 3.7.6 for Windows. Put the following files in the following locations:
| File | Location | |
|---|---|---|
| glut32.dll | Windows XP | Server 2003: | C:\WINDOWS\system\ |
| Windows 2000: | C:\WINNT\system\ | |
| glut32.lib | C:\Program Files\Microsoft Visual Studio .NET 2003\Vc7\PlatformSDK\Lib | |
| glut32.h | C:\Program Files\Microsoft Visual Studio .NET 2003\Vc7\PlatformSDK\Include\gl | |
Note:
If you plan on giving your program to friends to
run using Windows, you must also include the glut32.dll file. If they
don't have this file in the same directory as your application or in their
C:\WINDOWS\system folder, the program will not run.
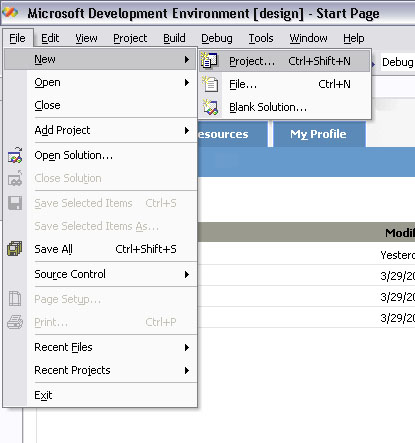
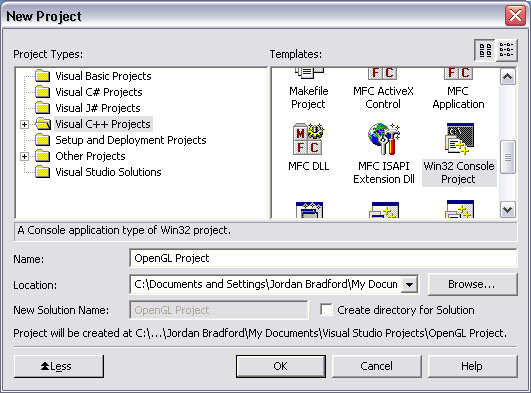
Because GLUT was designed to be window system independent — it makes its own windows — it is better to let GLUT run as a console application than as a native Windows application (which would require #include <windows.h>). To create an empty console project in Visual Studio, do the following:
Adding source files to the project should be familiar to you, so a detailed explanation is not necessary. There are two facts you should know, however.
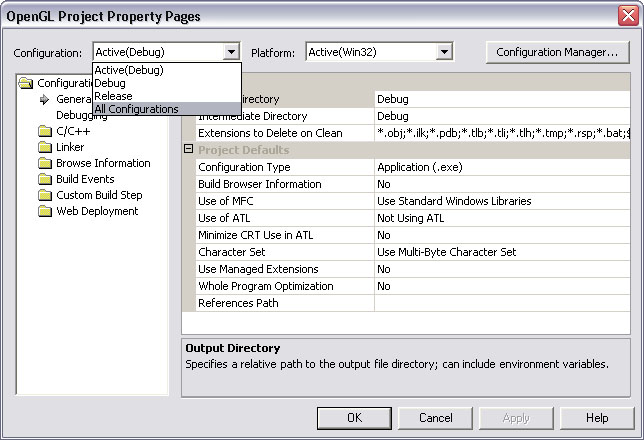
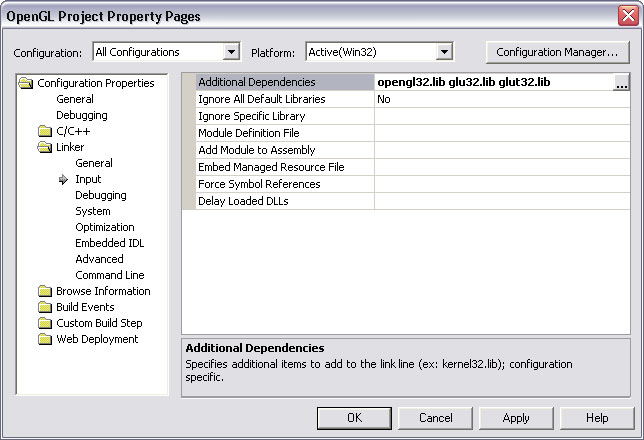
Before compiling your project, you need to set up Visual Studio's linker so it knows where to find GLUT. To do this, you must open the Property Pages dialog for your project. There are two ways to do this:

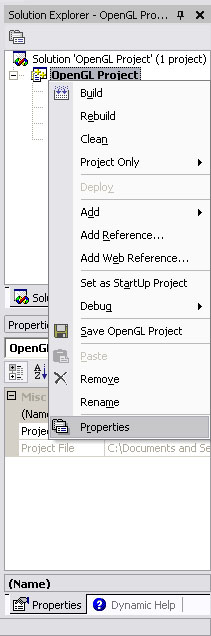
Using either option, the Property Pages dialog will open. Once it appears, do the following:
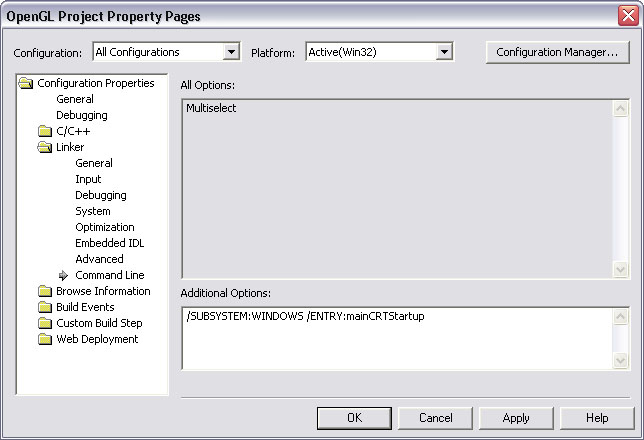
Note:
If you choose to disable the console window,
remember that you won't be able to see any console output from your program
using printf(), cout, cerr, etc.
Now your program is ready for development in an excellent IDE while still being portable. Be sure to test your program on a Linux machine before submitting it for grading. Your computer at home is most likely superior to the ones in the lab, so inefficient code might not be apparent.
Last Update: April 10, 2004
![]()